
quick superhero capes

My youngest children turn four today. Four. Just yesterday they were little bugs and now they are big bugs with minds of their own and (strong) opinions and language and incredible fashion sense.

And they really like superheroes. I mean really like superheroes. They have been talking about having a superhero birthday party for the last three months. They wanted to invite practically everyone we know to their birthday party. I agreed. I pinned. I planned. I was going to go all out. And then, with three weeks to the big birthday, I had no kitchen and half done floors and no idea when I might be back in my house. I caved. I just couldn’t throw a party. Total fail as Mother of the Year.
The kids agreed on several mini parties instead of one big party. We would still have superhero something, but we would do it at school. And so began the search for capes. The winner? This post on Apartment Therapy, which used old t-shirts to make no-sew capes. You read that right. No sew. Love at first sight.
While these capes were cute as made, I wore out my puffy painting welcome during my sorority days, so I needed another design for the back of the capes. I loved these initial capes from Etsy. Was I actually going to throw sewing back into the mix? No. Was I actually going to cut out the first letter of thirteen names? No. We needed to simplify. And I saw these cute, simple shape capes. I was sure I could cut a star or a lightning bolt. Done.
We found t-shirts on the clearance rack at Old Navy for $0.97 - $2.97 each. We used boys’ small, but anything larger than that would work great too. Cutting the shirts is easy and the photos on Apartment Therapy are a great visual for this step. Start at the bottom on one side of the t-shirt back. Cut all the way up around the inside of the sleeve seam to the front of the shoulder then around the front of the neck and back down. The cut knit doesn’t fray, but it does roll in. This is actually a good thing because it covers up where your cutting might be less than straight. I’m sure yours will be perfectly straight and you won’t need this little tip.
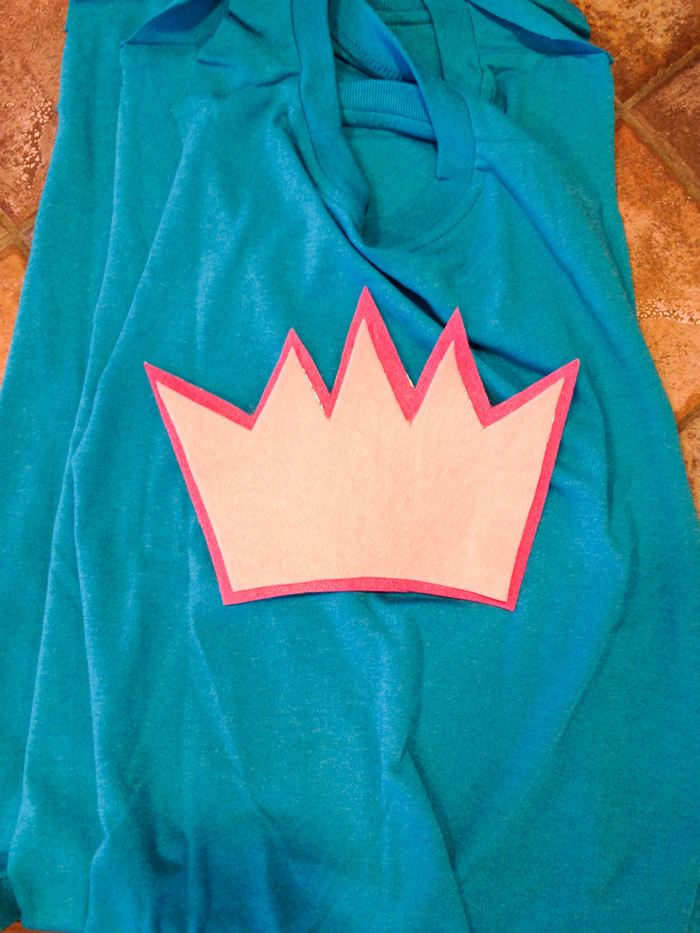
For the back of the capes, we used colored felt and double-sided iron-on bonding. I cut the lightning bolt out of paper, then traced it onto the smaller layer of felt using a sharpie at the corners.
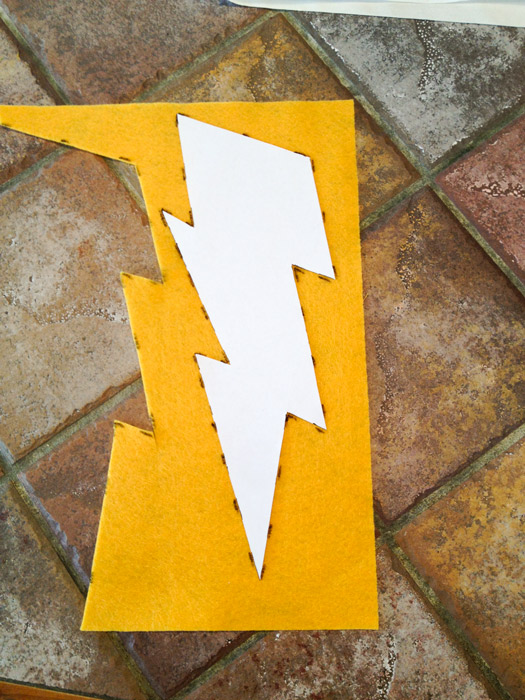
Once cut, I placed the smaller shape onto the background felt and cut around the smaller shape. The beauty of felt is that it sticks to itself, making cutting this second shape pretty easy.

We first ironed the bonding material onto each shape, then the larger shape onto the cape, and finally the smaller shape onto the larger shape.

The bonding instructions suggested that each of these steps would take six seconds. Wrong. Prepare to iron forever. Thanks to my mom for being in charge of the ironing.
The results?

Pretty cute. We've been testing these out now for a week or so and I think they are going to last through the whole party. I'm hoping for longer. You can do this. Go ahead. Make some capes.